How to Track Confirmed, Pending & Declined Guests Easily
By Link of Time • Published Mar 07, 2026 • Updated Mar 08, 2026
One of the biggest challenges when planning an event is knowing exactly who is attending and who isn’t. When guest responses are scattered across texts, emails, and social media messages, it becomes difficult to maintain an accurate headcount. This is where guest tracking through an invitation website becomes extremely valuable.
With Link of Time, hosts can track confirmed, pending, and declined guests in one organized dashboard. Instead of manually compiling responses, the system automatically categorizes guest statuses, helping you stay organized and make better planning decisions.
In this guide, you’ll learn how to track confirmed, pending, and declined guests easily, where to access your guest list, and how to manage guest information efficiently.
Why Guest Tracking Matters for Event Planning
Accurate guest tracking helps hosts avoid common event planning problems such as:
- Overbooking or underestimating seating
- Ordering incorrect catering quantities
- Missing important guests in the final headcount
- Losing track of RSVP responses
A structured guest tracking system allows you to monitor attendance in real time and prepare your event with confidence.
This becomes even more powerful when combined with an online RSVP system, which automatically records guest responses inside your dashboard. If you want to understand how this works from the guest perspective, see how RSVP responses are collected online.
How to Access Your Guest List
Link of Time provides two convenient ways for event owners to access their guest management dashboard.
Option 1: Access Through Your Account Dashboard
The first method is through your account.
- Log in to your Link of Time account
- Go to your Account Dashboard
- View the list of events you created
- Click Manage Event
This will open the Event Dashboard, where you can see your guest list table and RSVP statistics.
Option 2: Access Through Your Invitation Website
You can also access your dashboard directly from your invitation page.
- Open your invitation website
- Scroll to the bottom of the page
- Click “Access Owner Page”
Two things may happen:
- If the account that created the event is already logged in, you will be taken directly to the Event Dashboard.
- If not logged in, the system will ask for the event password before granting access.
This flexible access makes it easy for hosts to check their guest list anytime.
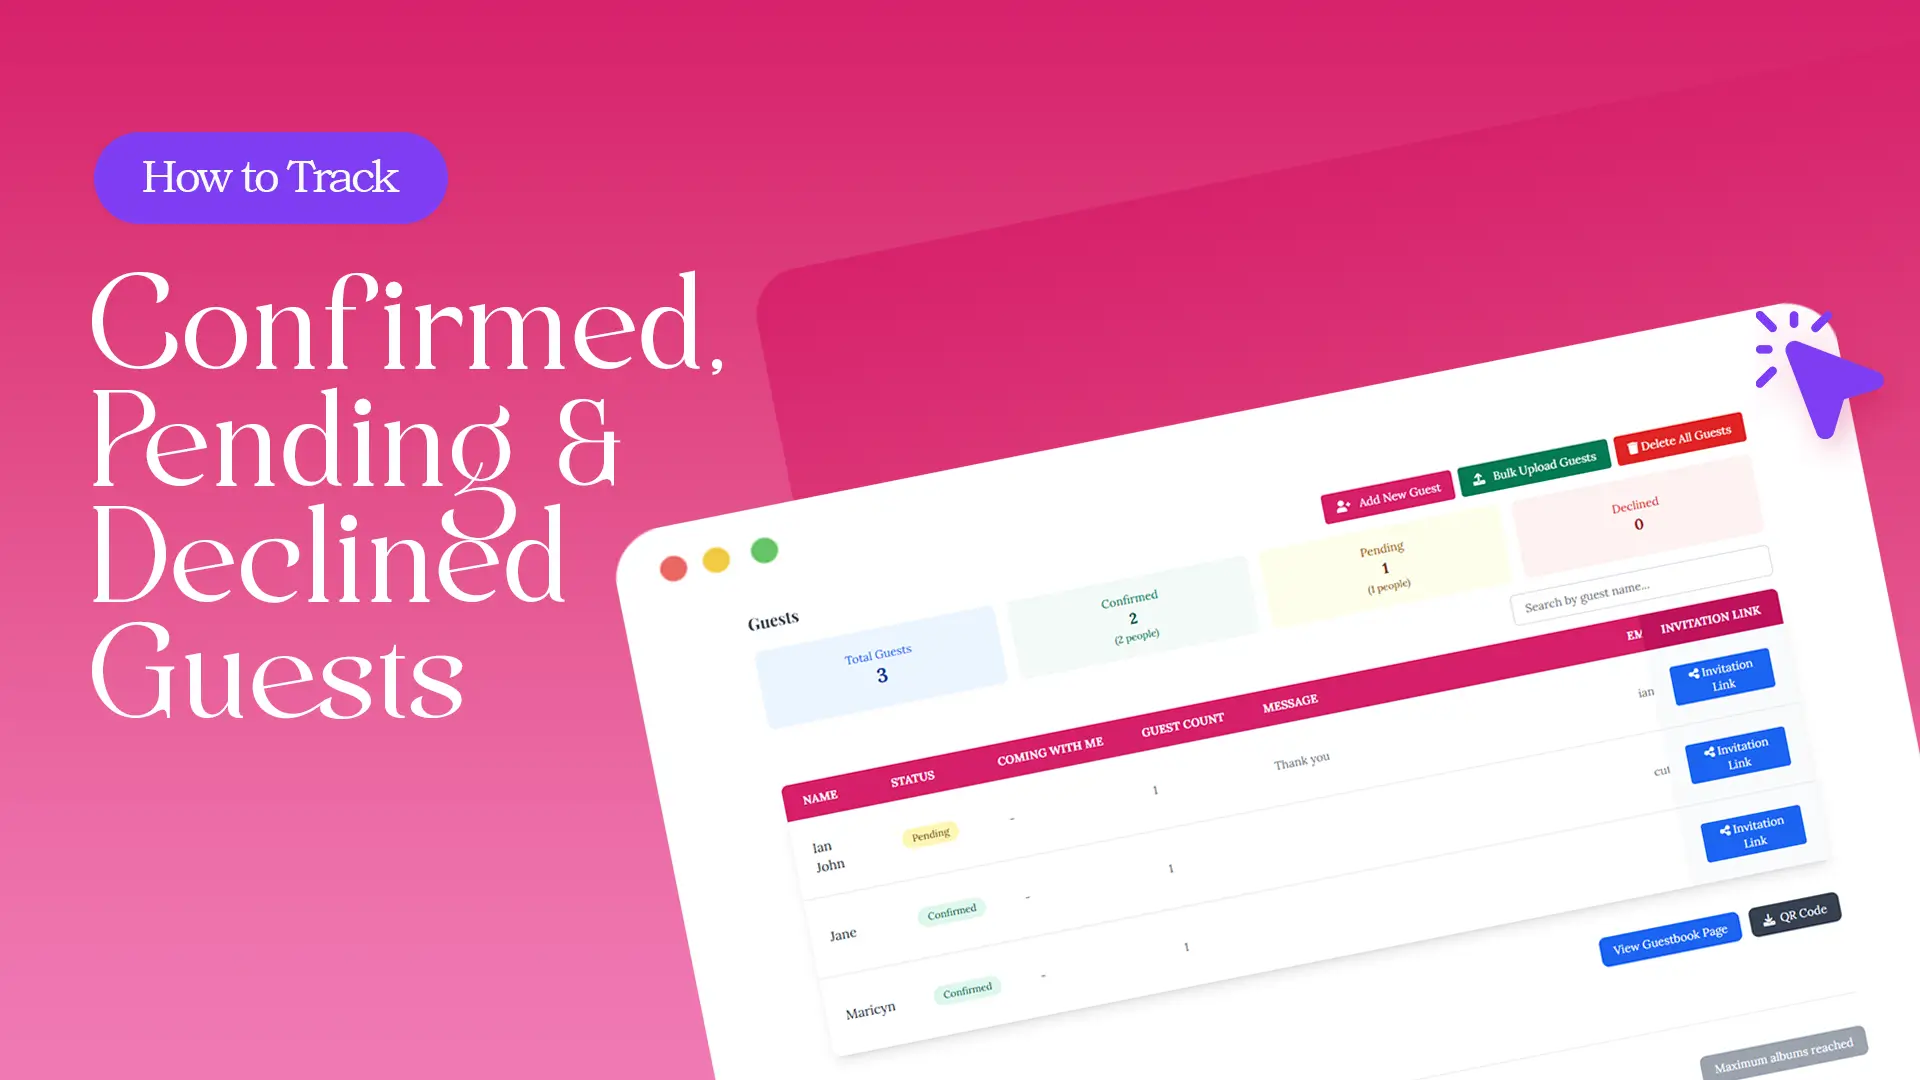
Understanding the Guest List Dashboard
Inside the Event Dashboard, you will find a guest list table along with a summary of guest statuses.
Example overview:
Guests
- Add New Guest
- Bulk Upload Guests
- Delete All Guests
Guest Summary
- Total Guests: 4
- Confirmed: 3 (3 people)
- Pending: 0
- Declined: 1 (1 person)
These categories help you quickly understand your event’s attendance status.
For larger events, this kind of organized tracking prevents the confusion that often happens when responses are scattered across different channels. According to event planning insights from Cvent, centralized guest management significantly improves event coordination and planning accuracy.
How to Add Guests to Your List
If you need to add guests manually, you can do so directly from the dashboard.
Click “Add New Guest” to open the RSVP modal.
Add New RSVP Fields
Inside the form, you will see the following fields:
- Guest Name – required
- Guest Role – optional (e.g., bridesmaid, family, VIP)
- Email – optional
- Phone – optional
- Status – optional (Confirmed, Pending, Declined)
- Guests Count – optional (for plus-ones)
After entering the details, click Add RSVP to save the guest.
This method is useful for adding individual guests or recording responses that were received offline.
Managing Large Guest Lists Faster
If you are handling many guests, adding them one by one may take time. In that case, you can use the Bulk Upload Guests feature to import multiple names at once.
This is especially helpful for weddings, corporate events, or large celebrations. You can learn more about this workflow in uploading multiple guests quickly.
Best Practices for Guest Tracking
To maintain a clean and reliable guest list:
- Add guests before sending invitations whenever possible
- Regularly check your dashboard for new RSVPs
- Use guest roles to identify important participants
- Review confirmed guest counts when planning seating and catering
These small habits can make a big difference in keeping your event organized.
Frequently Asked Questions
Conclusion
Tracking confirmed, pending, and declined guests doesn’t have to be complicated. With Link of Time’s built-in guest tracking system, all responses are organized in one place, making it easy to monitor attendance and plan your event with confidence.
By accessing your Event Dashboard, adding guests, and reviewing RSVP statuses regularly, you’ll always know exactly who’s coming.
Ready to simplify your event planning? Start managing your guest list today and keep every RSVP perfectly organized.
Comments
No comments yet.